如果免费资源下载的文件为TXT文档 请联系站长更新!站长微信:Lv596999 Telegram:@eapoj “Mql5官网”板块的EA基本都有,大部分是无限制NODLL版,NODLL版本MT1420升级,大多数不可用!这些EA来源为国外花钱买过来的 如有需要,请联系站长! “EA测评”板块资源全部现有,看见不错的,可以联系站长,看EA在确定是否收费。 “无限制EA”板块,大部分免费,下载文件全部存在,都可以免费下载。 站长硬盘EA太多,因大部分时间做交易,做风控,没太多时间更新下载地址,请谅解! 需要更新下载文件,请联系站长微信!国外朋友请联系Telegram。  |
This may just look like another indicator for identifying and displaying supply and demand, but dig-in further and you will discover it has much more to offer.
In addition to the complete flexibility for displaying zones, consider the identification of recent support or resistance, the back-testing capability to help you learn how to identify the best supply and demand zones to trader from, the continuously updated trend information for all time frames, times from around the world displayed on your chart and the on-screen lot size calculation for if you decide to place a limit order on the zone.
This is an indicator that is not only powerful but won’t bring your system to its knees as soon as its used on multiple charts.
In Standard mode
- Zones calculated for all time frames from M1 to MN1
- The latest line of support or resistance calculated for all time frames
- Provides complete flexibility to change which time frame zones appear on your current chart. There is no limit to what combination of zones can be displayed, For example:
- show daily and current time frame zones only
- show lower time frame zones only
- Gives visual clarity of time frame for zones by colour
- Easy to increase or decrease the time frame of zones shown on your chart with a single key-stroke.
- For any chosen time frame, use a single key to filter zones
- toggle supply and demand zones on or off
- display only zones in line with the trend
- merge overlapping zones, or hide the zone closest to the current price
- hide zones that have already been retested at least once
- For selected time frames, add/remove fill for zones to provide greater visibility on your charts.
- Display recent support/resistance for the chart time frame.
- Temporarily hide any displayed zone just by double-clicking on it
- Toggle the display of all zones on/off with one keystroke
- Continuously see an indication of the trend across all time frames from W1 to M15
- Whilst the markets are open, see what the time is in each of the major zones (Tokyo, London, New York) – automatically configured and adjusted for daylight savings.
- Display zone labels that include lot size calculation based on parameters of account balance and percentage risk set for the indicator
- Remove the indicator completely with a single key-press.
- On-screen menu of shortcut keys available to toggle on/off
In Back-testing mode
- All of the features available in standard mode also present in back-testing mode
- Double click any candle to view zones and S&R as of that time
- Step back or forward in time candle-by-candle on the chart
- Step back or forward in time, candle-by-candle on a smaller time frame and see smaller time frame zones as they come and go.
- Candles from the future hidden from view to give a more realistic chart display.
- Display of what the time is in each major zone updated based on the back-testing candle time.
- Display of trend for each time frame updated based on the back-testing candle time.
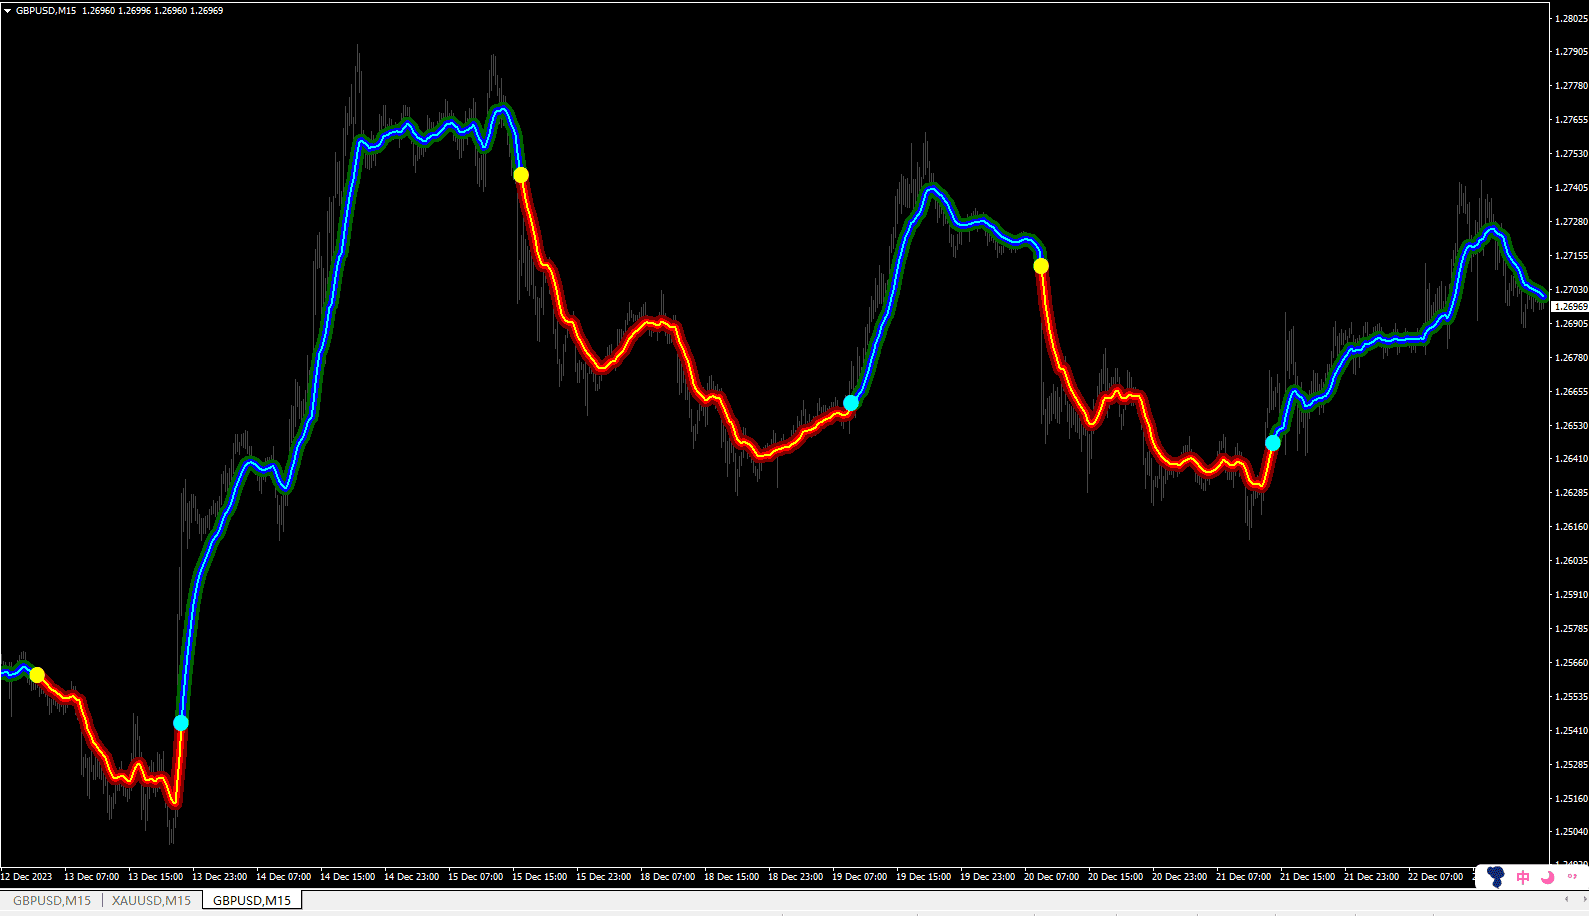
Chart Annotations
- Refer to the diagram below:
- Local time for Tokyo, London, New York and your local area (based on computer time).
- Current and next higher time frame trends
- Trends for all time frames from W1 down to M15
- The currently selected period (e.g. for hiding/displaying zones or adding filters)
- A list of filters or settings currently applied to the chart
- A list of the zone time frames being displayed on the chart
- Line of recent support or resistance (thick line protruding out to right)
- An untested zone (drawn with thick solid lines)
- A zone that has been retested at least once (drawn with thin solid lines)
Menu
It’s possible to toggle the menu on or off any time the indicator is loaded on the chart by pressing the key with “?” on it. The following menu items will be listed:
- C – Display on/off
- H – Show next HTF zones
- L – Show next LTF zones
- T – Zones With trend only
- D – Demand zones on/off
- S = Supply zones on/off
- M – Merge overlapping zones
- O – Ignore overlapping zones
- < – Select lower TF
- > – Select higher TF
- Z – Zones on/off for TF
- X – S/R on/off for TF
- R – Retested zones on/off for TF
- F – Shade zones on/off for TF
- Mouse double click on zone – hide zone
- ——————-
- B – Back-testing mode on/off
- < – Go back a candle
- > – Go forward a candle
- Mouse double click on candle – go to candle
- ——————-
- ? – Menu on/off
- ‘ – Labels on/off
- 0 – Reset indicator
- Q – Delete indicator
![图片[1]-Mql5官网 Identify and Backtest Supply and Demand 外汇EA-EA侦探社 - 全球领先的MQL5官网外汇EA机器人MT4自动化交易EA资源免费分享网站](https://sp-ao.shortpixel.ai/client/to_webp,q_glossy,ret_img/https://www.mql5.vip/wp-content/uploads/2024/05/20240518023548-664814049102d.png)
![图片[2]-Mql5官网 Identify and Backtest Supply and Demand 外汇EA-EA侦探社 - 全球领先的MQL5官网外汇EA机器人MT4自动化交易EA资源免费分享网站](https://sp-ao.shortpixel.ai/client/to_webp,q_glossy,ret_img/https://www.mql5.vip/wp-content/uploads/2024/05/20240518023549-664814052a247.png)
![图片[3]-Mql5官网 Identify and Backtest Supply and Demand 外汇EA-EA侦探社 - 全球领先的MQL5官网外汇EA机器人MT4自动化交易EA资源免费分享网站](https://sp-ao.shortpixel.ai/client/to_webp,q_glossy,ret_img/https://www.mql5.vip/wp-content/uploads/2024/05/20240518023549-66481405bd21b.png)